How to PROPERLY implement ControlValueAccessor - Angular Form
"How to create your own FormControl (ControlValueAccessor) for your Angular application, and common pitfall to avoid."
The ControlValueAccessor (CVA) interface exposes functions that allow Angular's forms, both template driven and reactive, to communicate with a custom form control component.

Let's create our own CVA
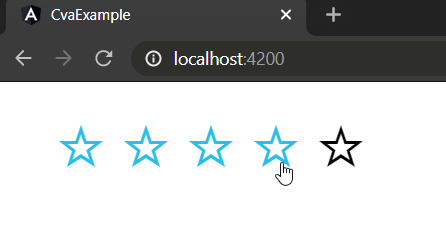
For this example, I am going to implement a basic star rating input where the user can click on the stars to give rating. I know, I know... another one of these star rating things but I do want to avoid having a native HTML <input> in here for now because those have their own best practices. Let's focus on the very basics of CVA for this post.
I want to focus on ControlValueAccessor implementation so I will skill the detail of the UI Implementation. You can refer to the code below:
// star-rating.component.ts

import { Component, Input } from '@angular/core';

@Component({
  selector: 'app-star-rating',
  templateUrl: './star-rating.component.html',
  styleUrls: ['./star-rating.component.scss'],
})
export class StarRatingComponent {
  @Input() numberOfStar = 5;

  currentRating: number;

  // *ngFor can't iterate on a number
  // so we are going to covert it to an array of [0...n-1]
  public toIterableArray(n) {
    return Array.from(Array(n).keys());
  }

  setRating(n) {    this.currentRating = n;  }
}
// star-rating.component.scss

ul.star-rating {
    list-style: none;
    color: black;
    padding: 0;
    margin: 0;

    &:hover {
      color: rgb(42, 190, 235);

      & li:hover ~ li {
        color: black;
      }
    }

    li {
      font-size: 3em;
      transition-duration: 300ms;
      cursor: pointer;
      display: inline;
    }

    .star-rating--highlight {
        color: orange;
    }
}
<!-- star-rating.component.html -->
<ul class="star-rating">
<li
*ngFor="let i of toIterableArray(numberOfStar)"
(click)="setRating(i + 1)"
[ngClass]="{ 'star-rating--highlight': currentRating > i }"
>
☆
</li>
</ul>
With this, whenever the user click on a star, setRating(n) will be called with n being the rating the user selected.
In order to get the component to talk to Angular's Form though, we need to implement a few more logics.
Import and implement the ControlValueAccessor
Import the ControlValueAccessor interface from @angular/forms and implements it in your component:
import { ControlValueAccessor } from '@angular/forms';

// ...
export class StarRatingComponent implements ControlValueAccessor {

}
Implement functions for Angular to register its callbacks
The first two functions we are going to implement are very straight forward:
registerOneChange() and registerOneTouched().
registerOnChange() allows Angular to pass its own OnChange() callback to your CVA. We can then use this callback to ask Angular to update its model–the form object–whenever our value change resulting from the user's interaction with the view. Our job, therefore, is to save this callback and call it at appropriate time.
The same goes for registerOnTouched().
export class StarRatingComponent implements ControlValueAccessor {
  // ...

  // Save the callbacks, make sure to have a default so your app
  // doesn't crash when one isn't (yet) registered
  private onChange = (v: any) => {};
  private onTouched = () => {};

  registerOnChange(fn: any): void {
    this.onChange = fn;
  }
  registerOnTouched(fn: any): void {
    this.onTouched = fn;
  }
}
Now, you will need to call these functions whenever a user interact with the UI in a way that will require the model to change. In our example, this happen when the user click on a star and set a new rating.
In our setRating(n) function, let's call the callbacks once a new rating is set.
  setRating(n) {
    this.currentRating = n;

    // Notify Angular to update its model
    this.onChange(this.currentRating);
    this.onTouched();

  }
With this, every time we click on a star, Angular will update the form's value automatically.
For now, let's implement an empty writeValue() function. We will come back to it in a moment.
export class StarRatingComponent implements ControlValueAccessor {

  // ...

  writeValue(obj: any): void {
    return;
  }
}
Connecting our custom component to Reactive Form
To see how this work, let quickly create an connect a Reactive Form in our AppComponent.
// app.module.ts

import { BrowserModule } from '@angular/platform-browser';
import { NgModule } from '@angular/core';

import { AppComponent } from './app.component';
import { StarRatingComponent } from './components/mycustominput/star-rating.component';
import { ReactiveFormsModule } from '@angular/forms';
@NgModule({
  declarations: [AppComponent, StarRatingComponent],
  imports: [
    BrowserModule,
    ReactiveFormsModule  ],
  providers: [],
  bootstrap: [AppComponent],
})
export class AppModule {}
<!-- app.component.html -->

<div>
  <app-star-rating></app-star-rating>
</div>
<button (click)="submit()">Submit</button>
// app.component.ts

import { Component, OnInit } from '@angular/core';
import { FormControl, FormGroup } from '@angular/forms';

@Component({
  selector: 'app-root',
  templateUrl: './app.component.html',
  styleUrls: ['./app.component.scss'],
})
export class AppComponent implements OnInit {
  title = 'cva-example';

  public form: FormGroup;

  ngOnInit(): void {
    this.form = new FormGroup({
      rating: new FormControl(),
    });
  }

  submit() {
    console.log(this.form.value);
  }
}
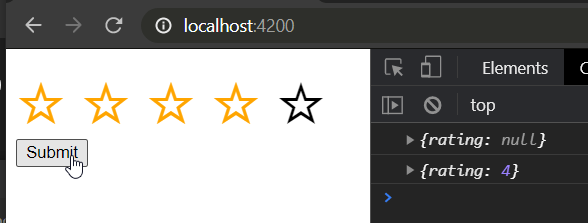
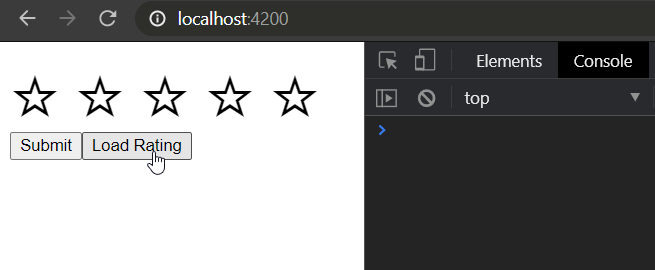
This add a button that will output the value of our form to the console when click.

It doesn't talk to our stars yet though so the value will always be null no matter what the star is at.
Let's solve that by binding our Reactive Form to the view.
As with your regular FormControl, you want to bind your root form object to formGroup and give your control its formControlName.
<!-- app.component.html -->

<div [formGroup]="form">
  <app-star-rating formControlName="rating"></app-star-rating>
</div>
<button (click)="submit()">Submit</button>
Once you hit save, Angular will complain about not being able to find an accessor Error: No value accessor for form control with name: 'rating'
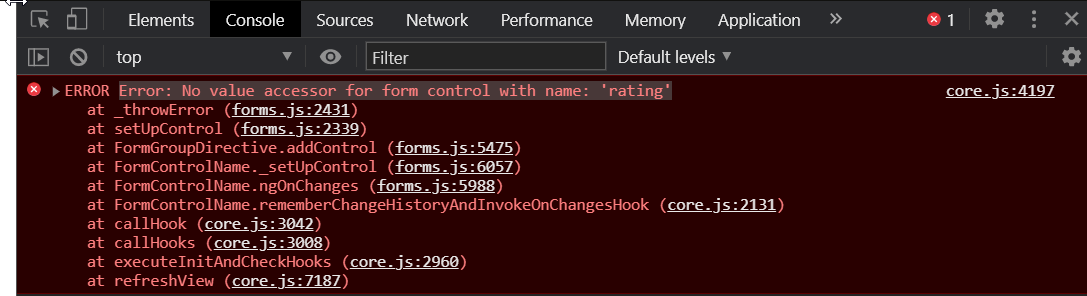
This is because we haven't register the new form control to the app yet.
We need to go back to star-rating.component.ts and let Angular know how to provide it.
// star-rating.component.ts
import { Component, forwardRef, Input } from '@angular/core';import { ControlValueAccessor, NG_VALUE_ACCESSOR } from '@angular/forms';
@Component({
selector: 'app-star-rating',
templateUrl: './star-rating.component.html',
styleUrls: ['./star-rating.component.scss'],
providers: [ { provide: NG_VALUE_ACCESSOR, useExisting: forwardRef(() => StarRatingComponent), multi: true, }, ],})
export class StarRatingComponent implements ControlValueAccessor {
// ...
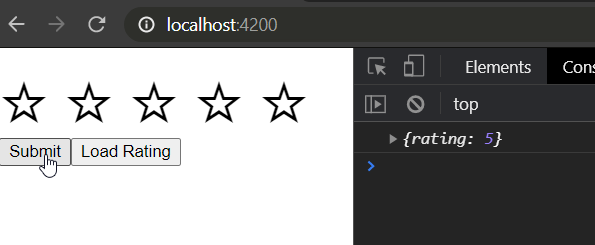
}With that done, our form model should now be in sync with our stars!
What about writeValue(v)?
Our new component seems to be working fine so far, and we haven't really done anything with the writeValue(v) component yet.
To make it clear what that function is suppose to do, let's create a new button and write some logic for it.
<!-- app.component.html -->

<div [formGroup]="form">
  <app-star-rating formControlName="rating"></app-star-rating>
</div>
<button (click)="submit()">Submit</button>
// highligh-next-line
<button (click)="load()">Load Rating</button>
// app.component.ts
export class AppComponent implements OnInit {
// ...
load() {
this.form.get('rating').patchValue(5);
}
}In a real app, you might have the user's current rating store in a database somewhere and you would want to load these ratings when the user return to your app.
For this example, load() will simulate a saved rating of 5 which we will patch into our form.
Now, if you click on the newly create load button, you will see... nothing!
Try submitting the form though and you will see that our value were indeed patched correctly.
By now, you probably realize what the problem is.
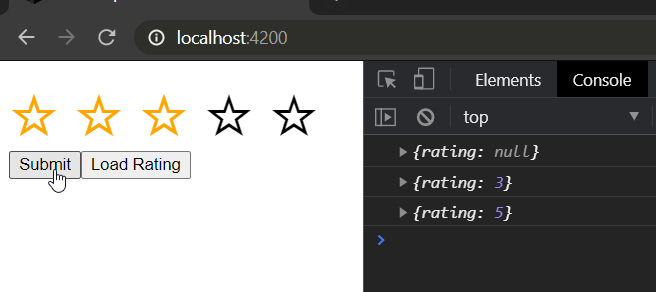
Our component communication currently only work one-way. Our stars can update the model's value, but our programmatic change to the model's value doesn't get reflect back on the UI!
This is where writeValue(v) comes in.
From Angular's API Docs:
writeValue(obj: any):void- This method is called by the forms API to write to the view when programmatic changes from model to view are requested.
writeValue() is called whenever a change is programmatically made to the model. It is to notify the view that it needs to update the UI. (It will not be called if the change in value is made from UI interaction, i.e. from the view itself firing OnChange()).
Let's go back to our StarRatingComponent, this time properly implementing the writeValue() function.
// star-rating.component.ts
export class StarRatingComponent implements ControlValueAccessor {
// ...
writeValue(rating: any): void {
this.currentRating = rating
}
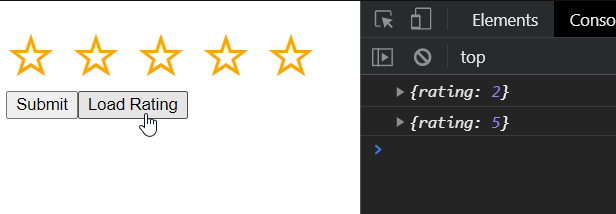
}With that, our UI now properly reflect the change!
Common Pitfall
I have seen way too many tutorials on the Internet telling you to call this.onChange() within the writeValue() method. You don't want to do this. It can cause some nasty infinite loop!
// DON'T DO THIS!!!

const _value: any
public set value(v): void {
	if (v) {
    	this._value = v
        this.onChange(v)        this.onTouched()    }
}

writeValue(v) {
	// The setter will trigger `onChange()` (and `onTouched()`)
    // and that will cause infinite loopin some cases
	this.value = v
}
Going back to Angular's API Docs:
writeValue(obj: any):void- This method is called by the forms API to write to the view when programmatic changes from model to view are requested.registerOnChange(fn: any):void- This method is called by the forms API on initialization to update the form model when values propagate from the view to the model.
The key is model to view and view to model.
The writeValue() method is reserved for cases where the form's value is changed outside the CVA. It is called by Angular so that the CVA can update its UI to reflect the change.
If you then call onChange() again, you would be passing the same value back to the form. Depending on how your form is setup, it can then register that change and pass it back to writeValue() again and bam! You got yourself an infinite loop!!! (A common case are when you use Reactive Form with NgRx. The form would trigger an action to a reducer which update the store. The store then propagate the update back to the form which pass it on the the CVA to update its view).
P.S. I don't actually like the name writeValue(v) so much. I think it's kind of misleading. Maybe something like updateViewFromModel(v) or just updateView(v) might be better.
setDisabledState?
The ControlValueAccessor also provide an optional method setDisabledState(isDisabled: boolean)?: void for us to decide whether we need to implement this or not.
As the name suggest, this function is called by Angular whenever the disabled state of the FormControl changed.
If your CVA encapsulate a normal HTML <input>, you will need to pass this isDisabled by setting an appropriate disabled attribute on your <input> element.
In our case, since we are not using any of those, we can simply block the user's input when disabled and apply some styling.
// star-rating.component.ts

// ...
export class StarRatingComponent implements ControlValueAccessor {

  isDisabled = false;
  setRating(n) {
    if (this.isDisabled) {      return;    }    this.currentRating = n;
    // Notify Angular to update its model
    this.onChange(this.currentRating);
    this.onTouched();
  }

  setDisabledState(isDisabled: boolean) {    this.isDisabled = isDisabled;  }}
// star-rating.component.scss
ul.star-rating {
    list-style: none;
    color: black;
    padding: 0;
    margin: 0;

    &:not(.is-disabled):hover {      color: rgb(42, 190, 235);

      & li:hover ~ li {
        color: black;
      }
    }

    li {
      font-size: 3em;
      transition-duration: 300ms;
      cursor: pointer;
      display: inline;
    }

    .star-rating--highlight {
        color: orange;
    }
}

ul.star-rating.is-disabled {    opacity: 50%;}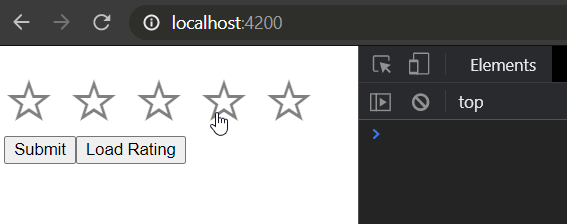
We do not want to block writeValue(v) when disabled though as the UI should still reflect changes to the model even when disabled (i.e. load() function should still update the number of star highlighted, regardless of whether the control is disabled or not). Whether the model can be changed or not outside the view is not up to the view to decide.
Here is the final code for star-rating.component.ts for your reference:
import { Component, forwardRef, Input } from '@angular/core';
import { ControlValueAccessor, NG_VALUE_ACCESSOR } from '@angular/forms';

@Component({
  selector: 'app-star-rating',
  templateUrl: './star-rating.component.html',
  styleUrls: ['./star-rating.component.scss'],
  providers: [
    {
      provide: NG_VALUE_ACCESSOR,
      useExisting: forwardRef(() => StarRatingComponent),
      multi: true,
    },
  ],
})
export class StarRatingComponent implements ControlValueAccessor {
  @Input() numberOfStar = 5;

  currentRating: number;
  isDisabled = false;

  // *ngFor can't iterate on a number
  // so we are going to covert it to an array of [0...n-1]
  public toIterableArray(n) {
    return Array.from(Array(n).keys());
  }

  setRating(n) {
    if (this.isDisabled) {
      return;
    }
    this.currentRating = n;

    // Notify Angular to update its model
    this.onChange(this.currentRating);
    this.onTouched();
  }

  // Save the callbacks, make sure to have a default so your app
  // doesn't crash when one isn't (yet) registered
  private onChange = (v: any) => {};
  private onTouched = () => {};

  constructor() {}

  writeValue(rating: any): void {
    this.currentRating = rating;
  }
  registerOnChange(fn: any): void {
    this.onChange = fn;
  }
  registerOnTouched(fn: any): void {
    this.onTouched = fn;
  }

  setDisabledState(isDisabled: boolean) {
    this.isDisabled = isDisabled;
  }
}
